
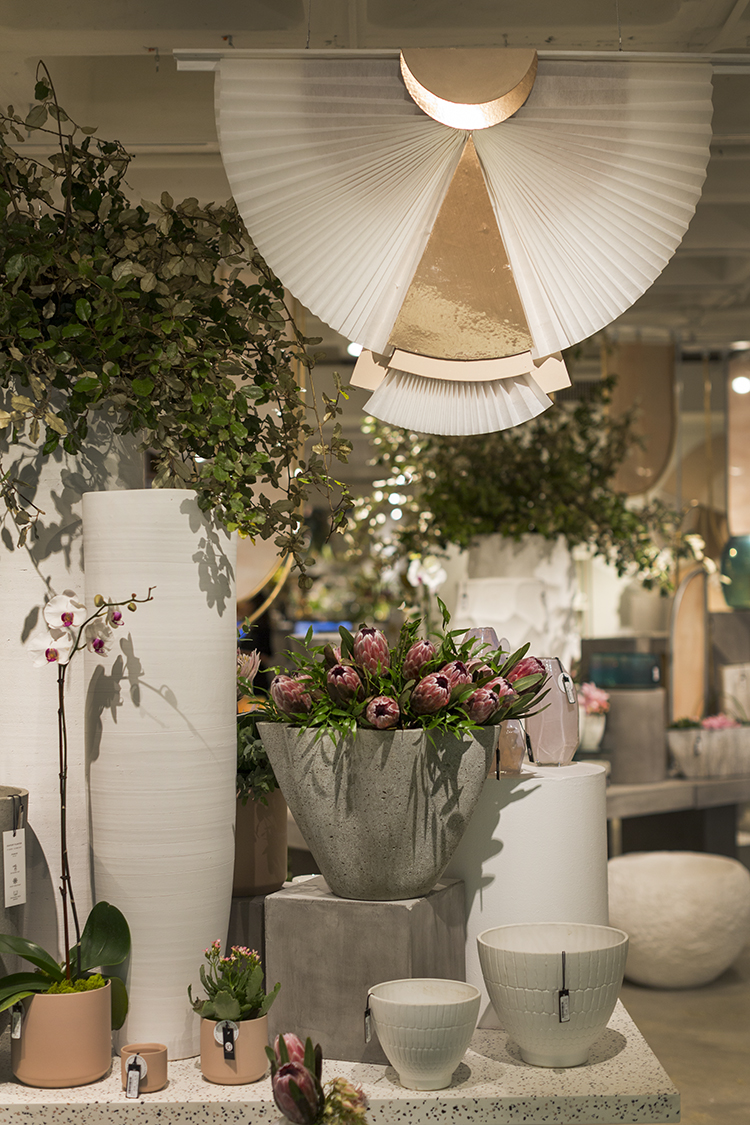
Each show season we are always asked about a variety of our displays: how were they constructed, what materials were used, can they be purchased, etc. One of our most talked about elements from our Wellness collection were the ‘fans’ used to accent the trend within the showroom. We asked our Visual Merchandising Manager, Caroline, to give us a run down on how to recreate these for your store visuals or your home!
_ _ _
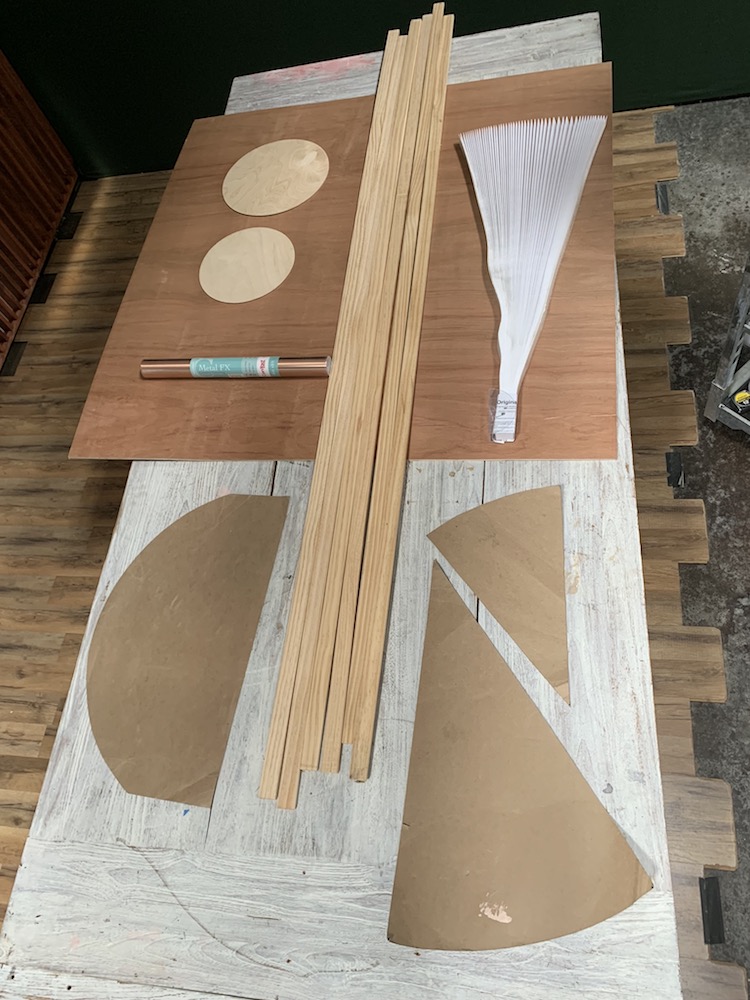
Materials:
4ft x 4ft Underlayment
Pre-cut wood circles
7ft long 1×7/16in pine trim pieces
Redi Shade white fabric window shade
Velcro
Metallic contact paper
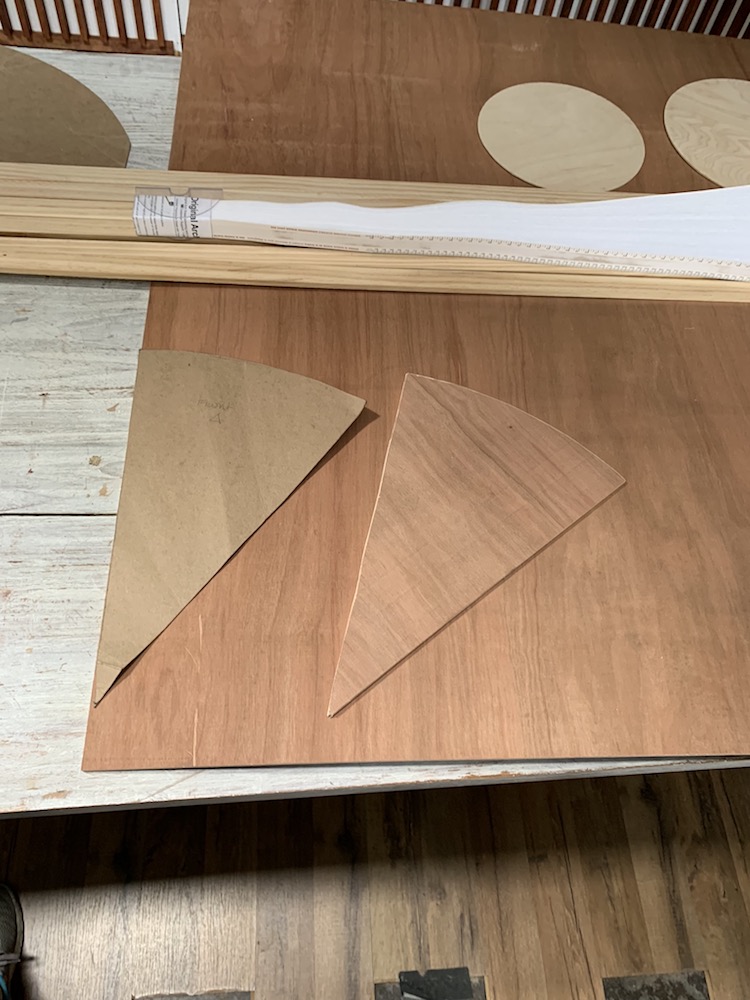
Chipboard templates (cut to your own specs.)
Paint
Sandpaper
Tools:
Jigsaw (to cut underlayment shapes)
Scissors
Paintbrush
Nail gun and 1” nails
Hot glue gun
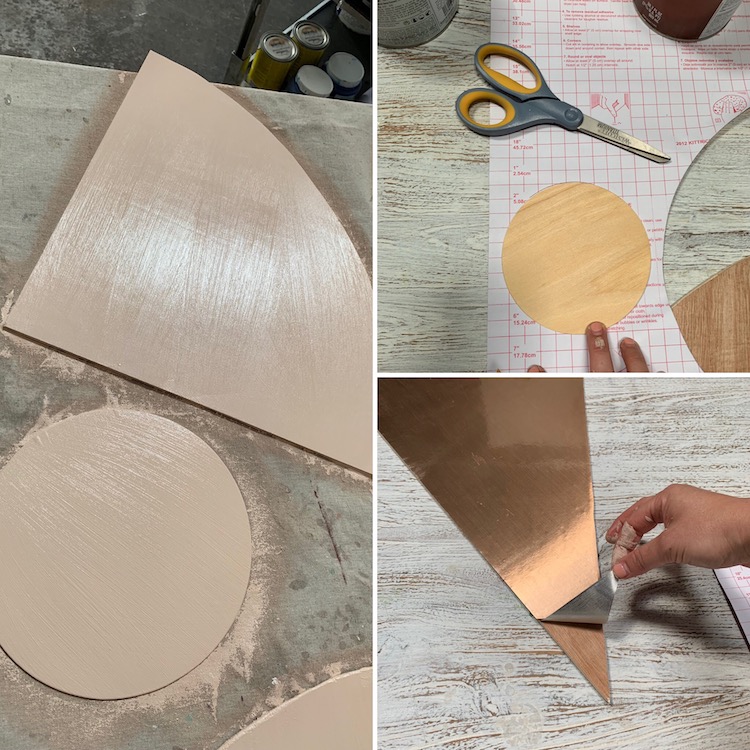
Step 1: Trace out shapes onto underlayment and then cut out with jigsaw. Sand edges of shapes for a smooth finish.
Step 2: Arrange shapes in the composition you want and decide which pieces to add metallic contact paper and which pieces to paint.
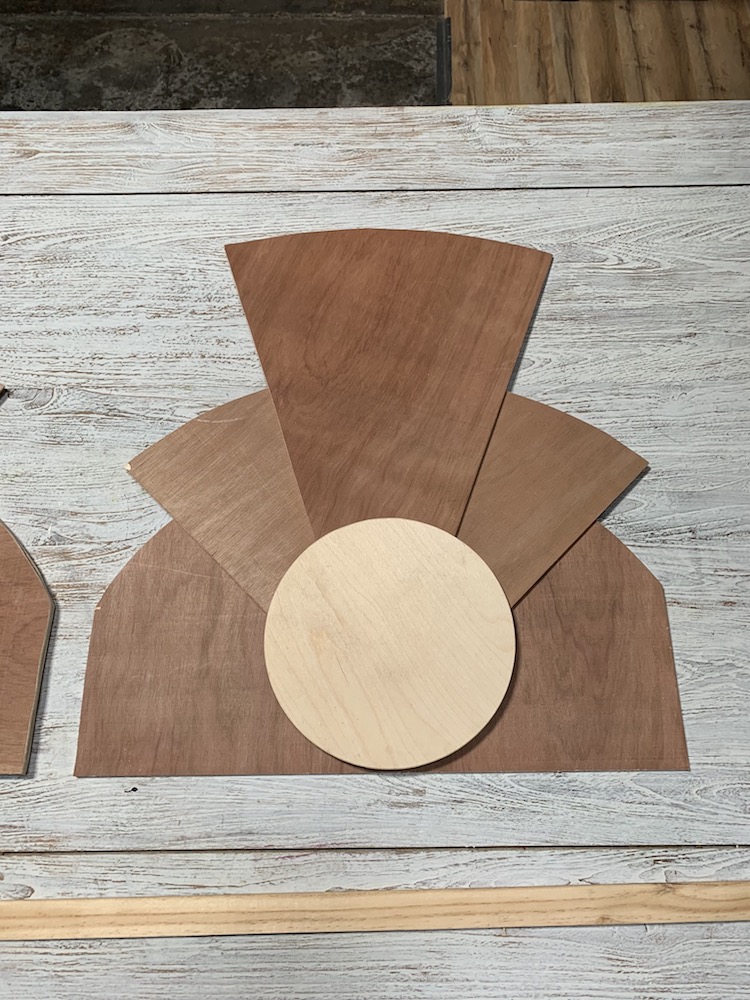
Step 3: Paint the shapes you picked out and let completely dry. Trace remaining shapes on back of contact paper and cut out. Peel and stick to the underlayment shape.
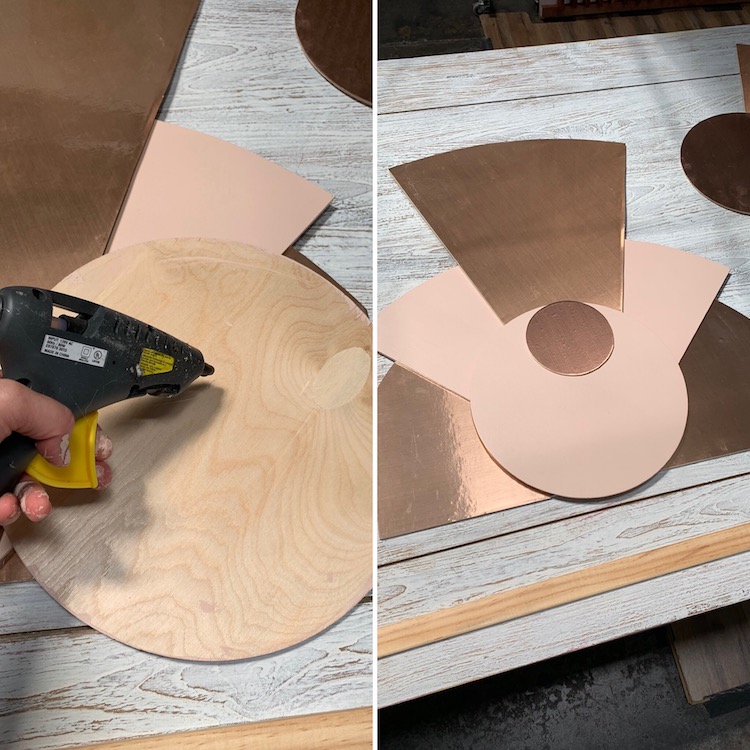
Step 4: Apply hot glue to backsides of underlayment pieces and layer/assemble in the order you pre-planned.
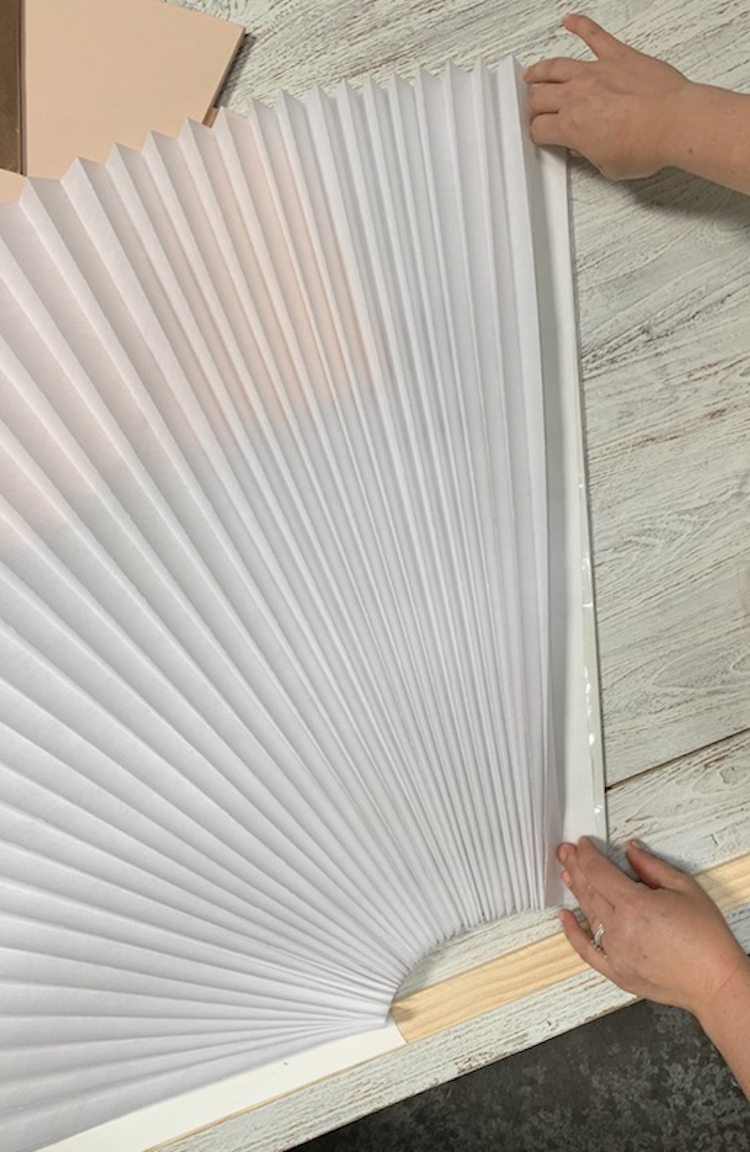
Step 5: Cut pine trim down to the full length of your desired fan size.
Measure shade and cut down. *Because the shade opens like a book, cut to half the length you want and then when fully opened, it will be the full size you want.
Remove adhesive cover from one side of the shade and stick onto flat side of trim. Spread shade open and do the same for the second side. Keep fan lying flat.

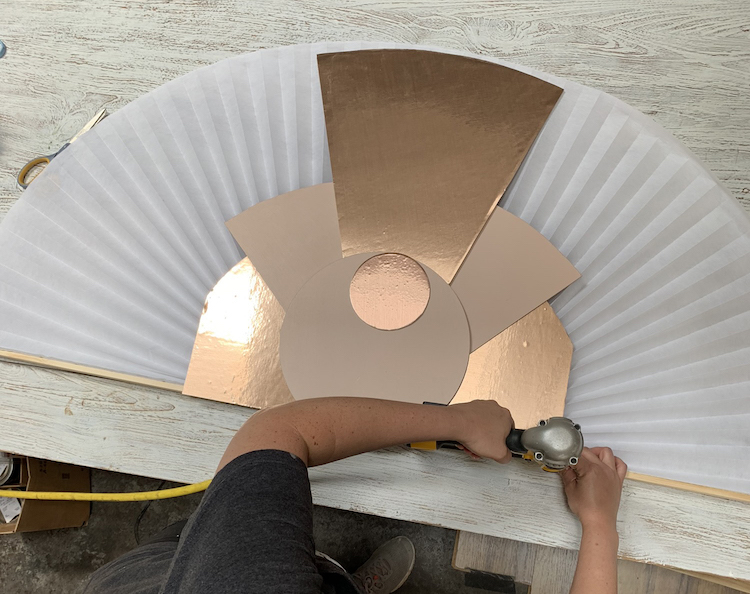
Step 6: Place glued underlayment design on top of fan and perfectly line up the bottom with the narrow side of the trim. If your bottom layer of the design is covered with contact paper, carefully lift the contact paper and nail the underlayment to the trim. Attach in 5 or 6 spots along the bottom so that the connection is secure.
Step 7: Flip the whole fan over. Cut a strip of Velcro to attach to the backside of your layered pieces to the inside of the fan. It should be short enough so that you can’t see the Velcro strip sticking out from the sides of the underlayment shape, but fairly long so that there’s several connection points between the shade pleats and the underlayment. Press the fan onto the Velcro so that it holds securely.
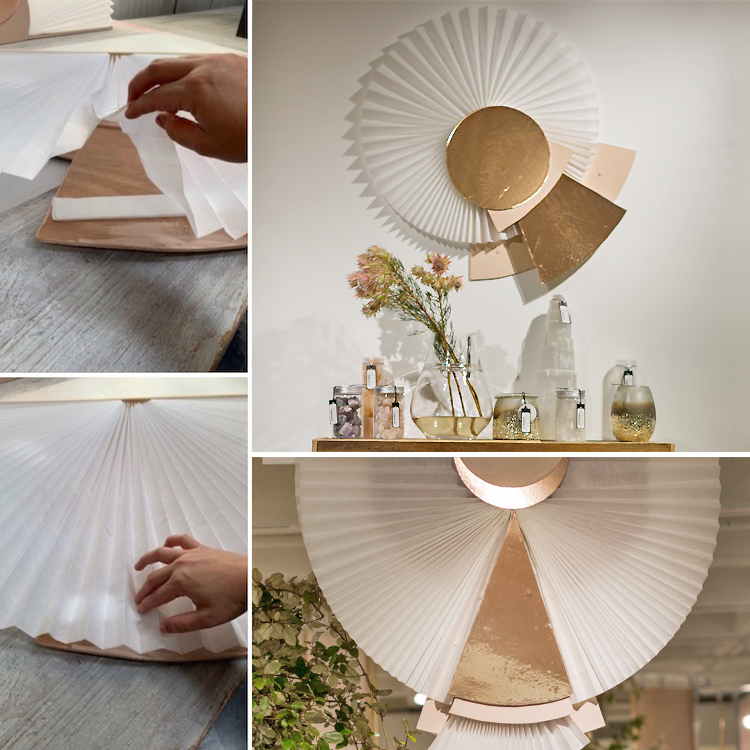
There are a variety of ways to display your fan! Add eye hooks to the trim and hang upside down, or let it sit on a surface as is. You could also drill a couple of holes through the trim and attach it perpendicular to a wall, or just tap a couple of level nails in the wall and let it hang flat like a frame. These are super versatile and you can make an endless number of combinations of shapes and sizes. A different color palette could completely change the feeling as well!
Enjoy!


COMMENTS ARE OFF THIS POST