
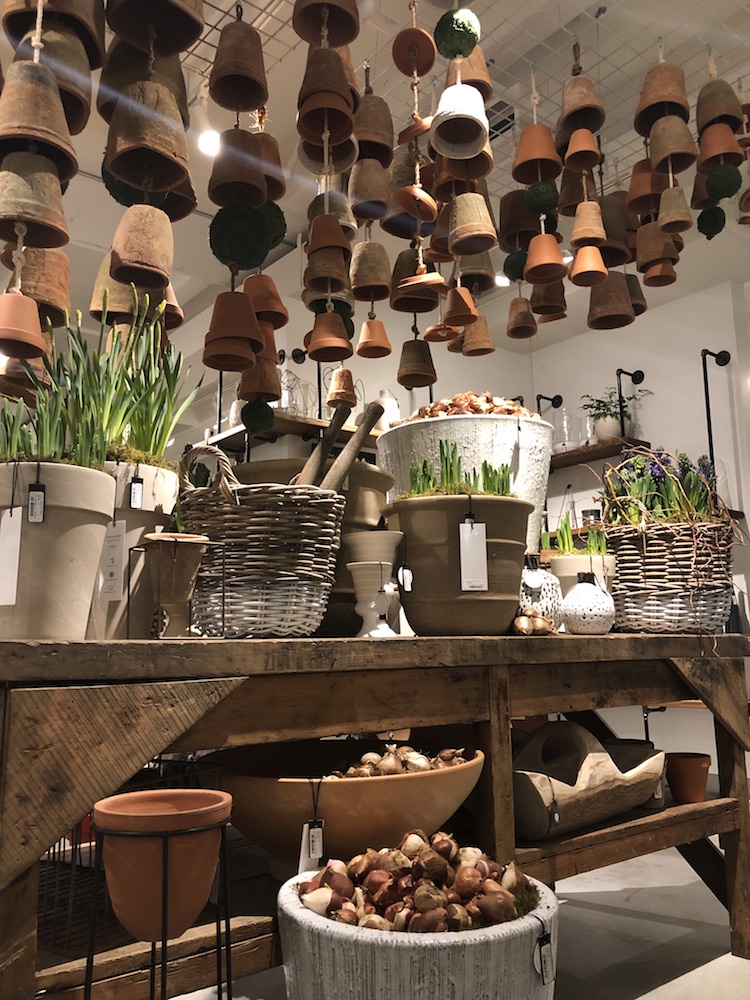
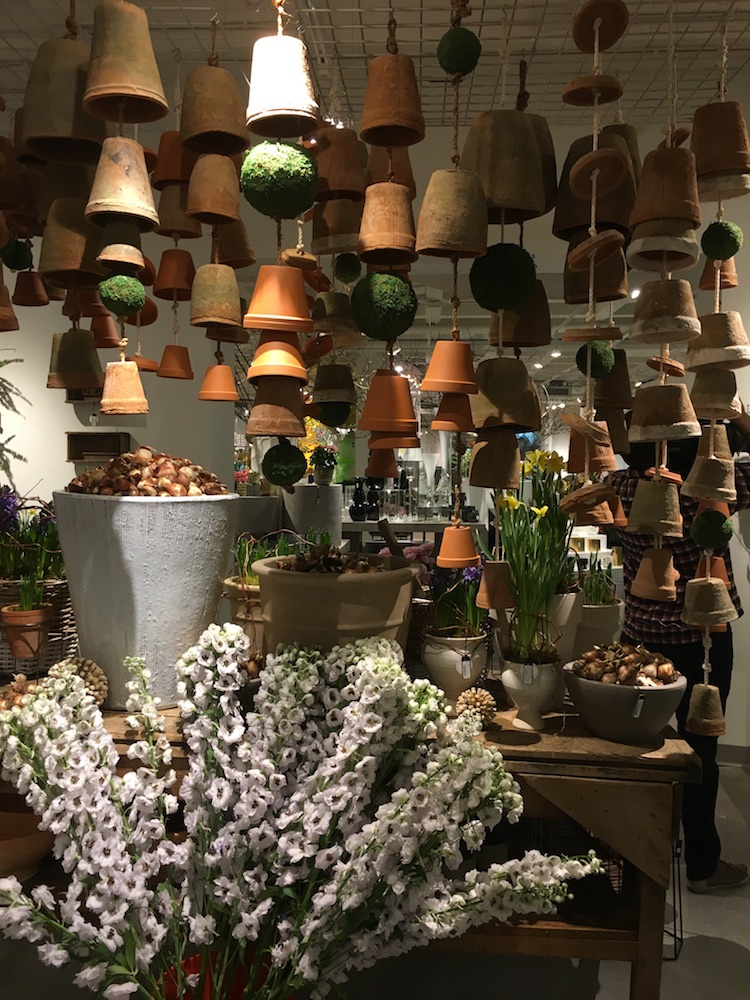
A few weeks ago we explained how our mounted pots were displayed in our AmericasMart showroom café area. Another one of our most popular displays was the hanging terracotta pots featured in all of our showrooms within our Plantspiration trend.
Pots used:
Red Clay Pot & Saucers
Organic Pot & Bowl
Terra Pot
Redstone Pot
Stark Pot
Clay Pot
Clay Saucers
4″ Moss Sphere
6″ Moss Sphere
Additional tools and materials needed:
Drill
Ceramic Drill Bit
1/4″ – 1/2″ Rope
Ceiling grid (or something to hang the chandelier from – warning: it gets heavy!)
2″ S hooks
Tarp to cover work surface / floor to catch dust from pots
Instructions:
Step 1: Flip pots upside-down to drill holes (note that Clay Pots already have holes)
Step 2: Using drill + ceramic drill bit, drill a hole in the center of each pot
Step 3: Using same bit, drill a hole through the entirety of each moss ballFlip pots upside-down to drill holes (note that Clay Pots already have holes)
Step 4: Using drill + ceramic drill bit, drill a hole in the center of each pot
Step 5: Using same bit, drill a hole through the entirety of each moss ball
Step 6: Cut rope according to how long you want each chandelier “strand” to be; create top loop (photo attached) to be your hanging point
Step 7: Slide pots onto rope; once you have pot in your desired position, tie a knot underneath the pot so it catches. Make sure the knot is large enough where the hole in the pot can’t slip over it!
Step 8: Continue the above process with various sized pots, mossballs, etc. Use your creative liberties for length, style, etc.
Step 9: Loop each strand onto an S hook; loop hook around ceiling grid. This method will make shifting and creating shape / density with your chandelier a breeze!
Voila!


COMMENTS ARE OFF THIS POST